The Little Pasta with a Big Pinch of Italian Tradition
Have you ever wondered if there’s a pasta that captures the heart of Italian tradition in every bite?
Meet the Plin, a charming little parcel of flavor from the Piedmont region of Italy.
The name Plin comes from the Italian Piedmontese dialect word “plinare”, which means “to pinch”. This perfectly describes how this cute pasta shape is made!
Plin are crafted by placing small amounts of filling (traditionally roasted meats and veggies) between two sheets of pasta dough. The edges are then pinched together, creating tiny, bite-sized parcels that are both fun to make and delightful to eat!
So now, LETS COOK SOME!
First, the Filling:
Any type of roasted meat and vegetables will work—leftovers are perfect for this!
Cut them into small pieces and, preferably, process them in a blender or food processor to obtain a thick paste.
Pasta Time:
- 1 kg of pasta flour (you can use 00)
- 14 egg yolks
- 7 whole eggs
Expecting more? Nope! Just add all the love and Italian vibes you can, and you’re set!
After all, Italian food isn’t about complicating things, but doing them with love and high-quality ingredients.
Tip: Use eggs with yellow-er yolks to give your pasta fresca its traditional golden color.
Pasta Instructions:
1. Place the flour in a bowl and create a volcano shape. Add the yolks and whole eggs into the center and start kneading until you have a homogeneous dough. Let it rest, preferably covered with a towel or plastic wrap, for about 30 minutes.
2. Once the dough has rested, roll it out to a thickness of 2-3mm and cut it into strips about 8-10 cm wide.
Tip: Don’t add any liquid, even if the dough seems too dry at first—just keep kneading, and it will eventually come together!
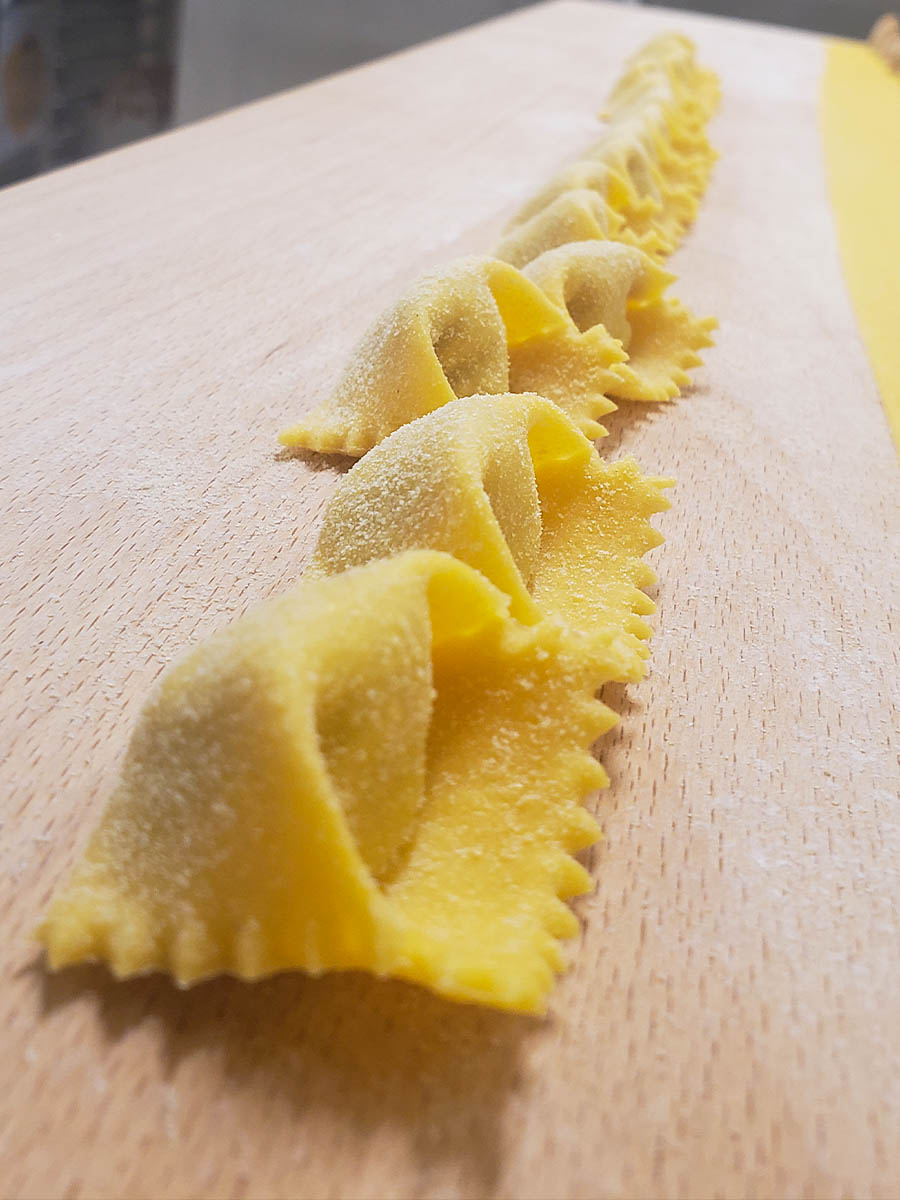
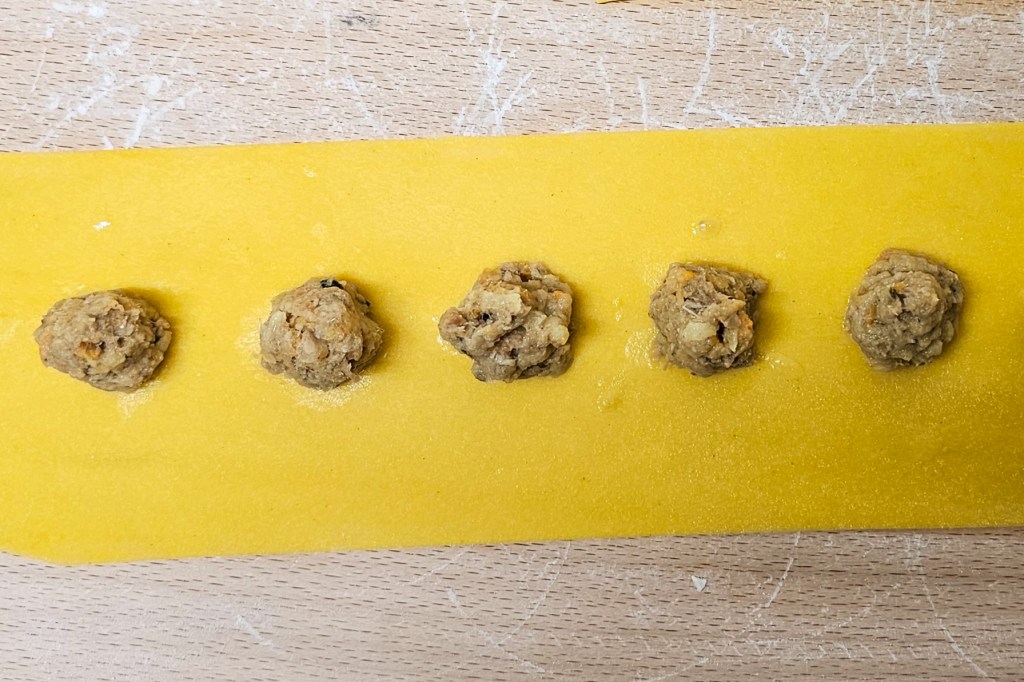
Shaping the Plin:
1. Start by placing the filling in the middle of the pasta sheet to make the folding process smoother.
2. Lightly moisten the upper half of the pasta sheet with water and a brush. Fold up the bottom part over the filling, pressing lightly at certain points to create a seal, but do not close it completely yet. This technique helps remove air bubbles when pinching the pasta.
3. Now for the fun part—pinching! Start pinching the pasta together to close the sides along the edges of the filling. The spaces between the fillings will be the limits, so be sure to leave enough space on both sides. Pinch twice to ensure it is properly sealed.
4. Now that we have the filling tight and without air pockets, we will seal the Plin by pressing the top part right next to the filling.
5. Finally, use your Italian pasta cutter to trim the edges with a nice zig-zag shape.
Storage Tip: You can freeze the Plin, so don’t be afraid to make a lot! But I’m sure you’ll be eating them quickly enough.
Cooking the Plin:
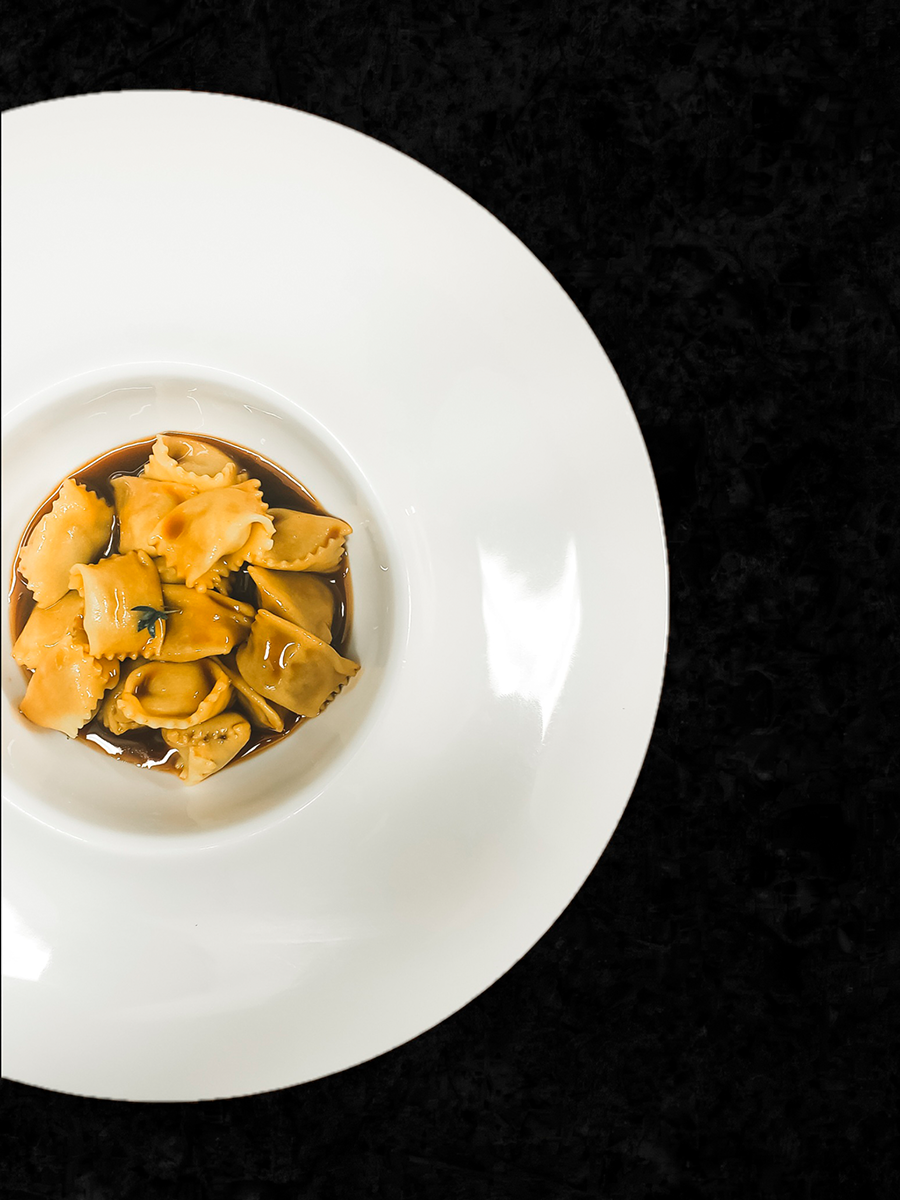
Pasta fresca cooks very fast. It usually takes up to 3 minutes to cook in boiling water. Enjoy your freshly made Plin in the broth of your choice, or toss them in a pan with some pasta water, butter and the herbs of your choice and let it reduce so it thickens up (or as Italians call it ‘Mantecare’).
CHECK THE FULL PROCEDURE!
Now that you know the story and craft behind Plin, it’s time to bring a taste of Piedmont into your kitchen. Whether you enjoy them in a warm broth or tossed with butter, this dish is sure to impress with its delicate texture and flavorful filling.
So, gather your ingredients, roll up your sleeves, and start pinching your way to a delicious meal. Buon appetito!


Leave a comment